Proximity Card Testing
The Problem
A potential customer has an existing door entry system but is unsure what proximity technology is in use by the cards/fobs they use. So resellers can provide the client with the correct card readers you need to know what the transponder type is. To work out what reader to provide, we offer Proximity Card Testing.
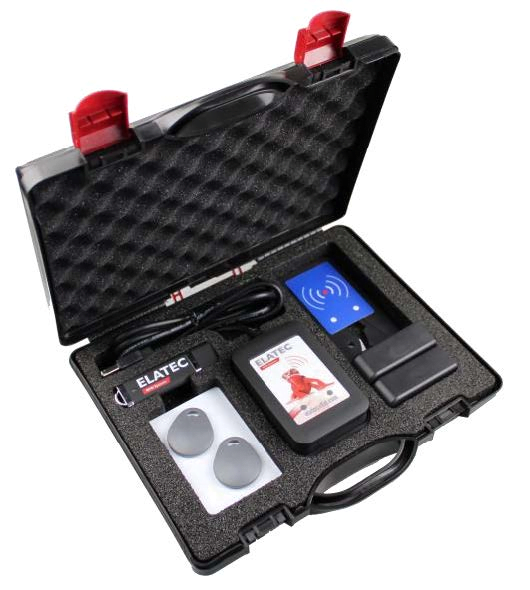
The TWN4 Tech Tracer Kit is used to identify RFID transponder technology in use at customer facilities by presenting the customer’s cards/fobs and reading the result on a PC.
How does it work?
Begin by plugging in the supplied USB reader to a computer. If this is the first time you are connecting the reader to the PC, a short driver install process will initiate, this is usually an automatic process by Windows.
Once connected, the device will beep and show a green light, at this point you may open notepad and begin scanning the cards you would like to test, all being well, you should see results for your cards, similar to the below screenshot. The screen grab below shows us scanning 6 different cards of various types onto the Tech Tracer.
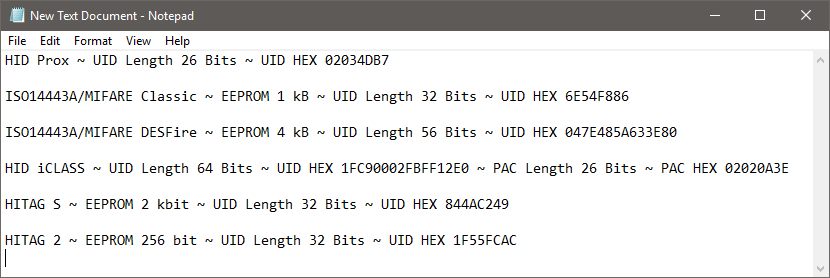
The type of card is displayed along with a hex read out of its unique ID number.
This output helps us identify the technology in use and then, if needed we can program the TWN4 reader to read just that card type to avoid confusion with other cards on site.
Configuring the reader
Once the card details are known, you may wish to use them to create a custom reader device image. This will ensure that only cards of the type/s in use by the customer will be read by the readers connected to their MFDs.
Next, we will outline how to create and program readers with a custom image.
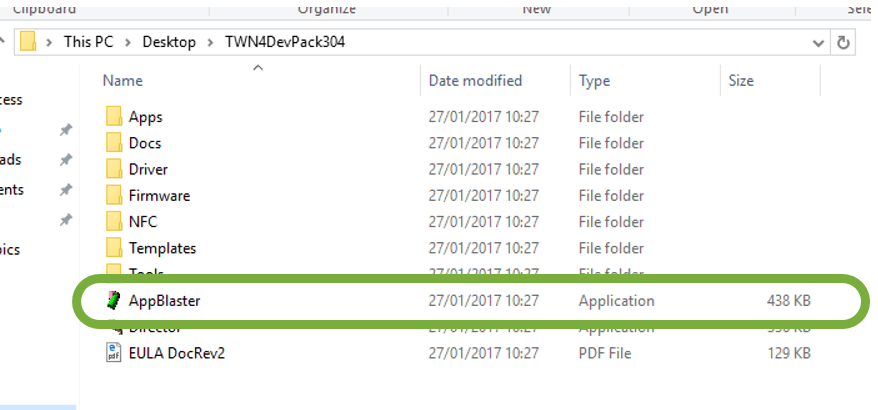
Begin by opening the AppBlaster software located in the dev pack download.
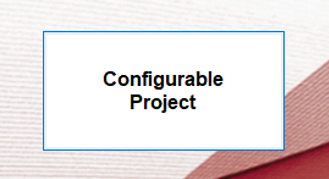
From the main window, select Configurable Project.
Next, we can begin to edit the image to include the card types and settings required. First, select and add the transponder types required.
(For the purposes of this article, we will use the details from the bottom line of the notepad screenshot from the top of the page.)
Select LF (125kHz/134.2kHz) then HITAG 2 and click add.
If the customer has more than one type of card in use, then they can also be added here.
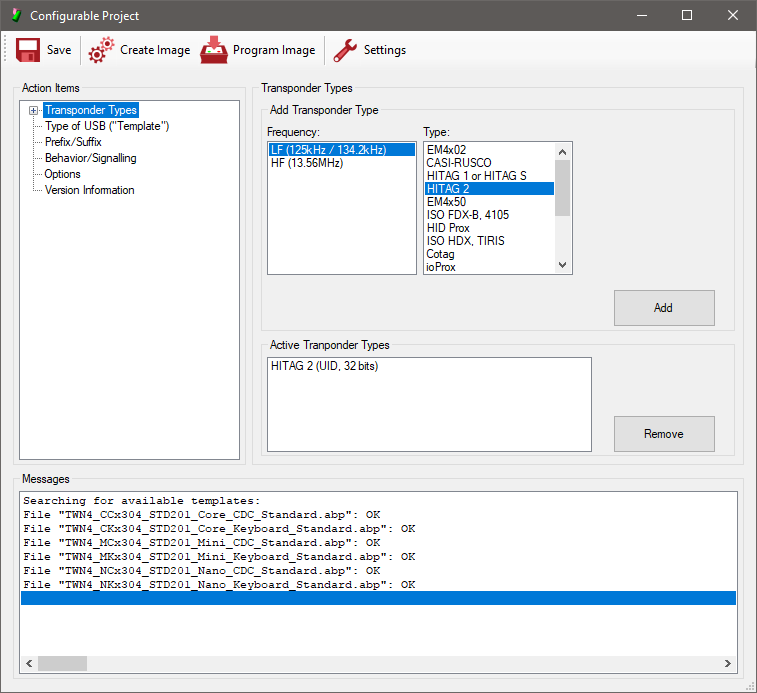
As we are happy to continue using the Hexadecimal output, we do not need to change any other settings here. But you may wish to choose one of the other options depending on your circumstances.
Next, we must set the USB mode to keyboard, so select the Firmware Core Module Keyboard template as indicated.

There are some further options available in the Action Items list, which may be applicable depending on your individual circumstances, but for the purpose of this article we can now move to the final steps, which are saving the image, and programming a reader with it.
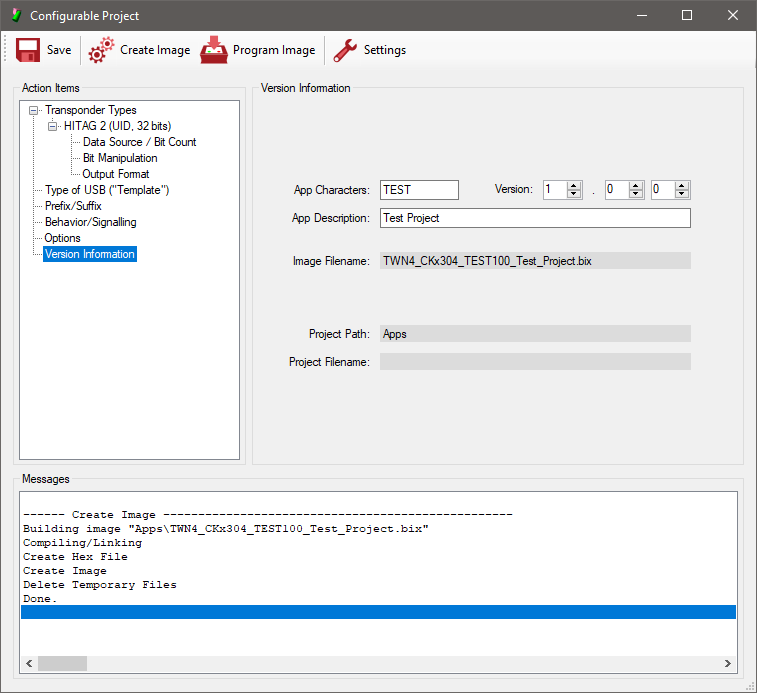
Under Version Information, you may set the filename of the image. Once done, select Create Image at the top and as per the screenshot, the image will be saved as a .bix file, to the apps folder contained within the main Dev Pack folder.
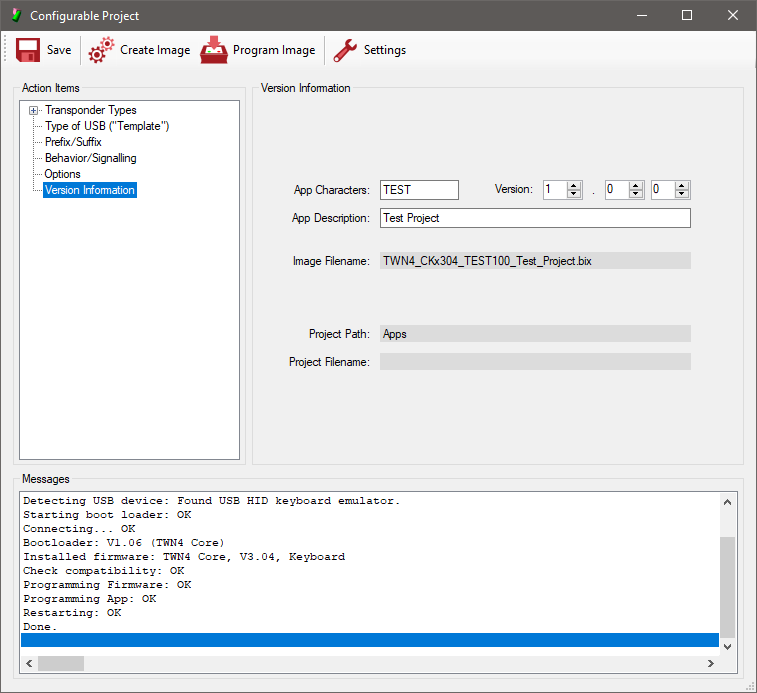
If you are following this guide while on-site deploying devices with a customer, then you may now choose to begin programming readers with your custom image.
To do this, simply plug in a reader and select Program Image at the top, and as per the messages window in the screenshot, the image should be uploaded to the reader in a few moments.
Finally, just to confirm. If you now go back into notepad and scan the card over the reader, you should see that it will give the ID of the HITAG 2 type card only, any other types will be ignored.
If you would like any further assistance with the processes described in this article, then please do not hesitate to get in touch with us.
Want to test your own cards in-house? Speak to your Channel Manager about a card testing kit and booking in time with our pre-sales team to discuss the idiosyncrasies (and often baffling) world of prox technology.