Drivve | Image debugger tool
Please follow these instructions to place Drivve Image into debug as requested by support.
Procedure in case of errors
1. Delete all old log files in the following directory:
<install path>\Drivve\Drivve Image\Log
2. Delete all files with the extension .log in the following directories:
<Install Path>\Drivve\Drivve Image\Web\Drivveimageweb\Log
<install path>\Drivve\Drivve Image\Web\Drivveimagews\Log
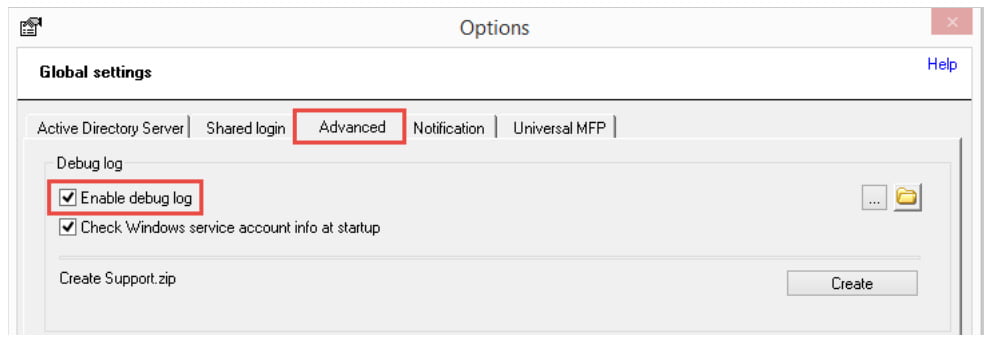
3. Enable the debug log:
- On the Tools menu, click Options.
- Click the Advanced tab.
- Select the option Enable debug log and click OK.
Click the Save button.
5. Reproduce the error.
6. Repeat the action that resulted in the error.
Note: If the error symptom is of the kind that the scanned files are put into the error folder …\Drivve\Drivve Image\work\error\[Subfolder per output document] instead of the defined output folder, you can reproduce the error like this:
Copy both files (the image file and the .meta file) from the folder … \[Subfolder per output document] to folder …\Drivve\Drivve Image\Hotfolder. Drivve Image will process the steps that originally resulted in the error. Take care to copy both files at the same time…. \[Subfolder per output document] to the Hotfolder <install path>\Drivve\Drivve Image\Hotfolder.
Drivve Image will process the steps that originally resulted in the error. Take care to copy both files at the same time.
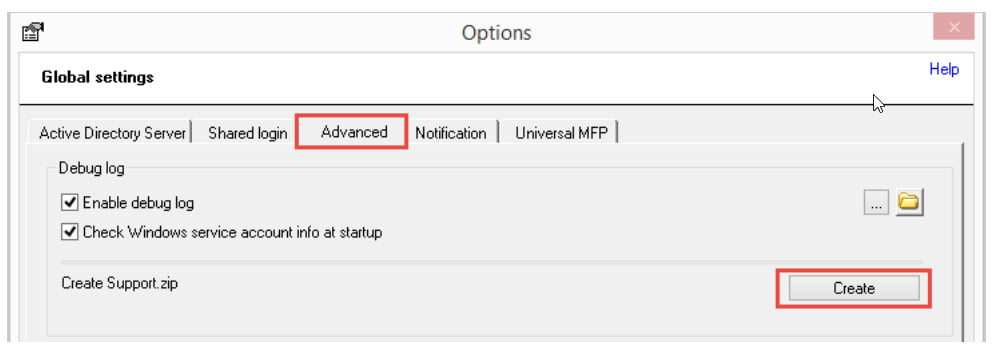
Produce a ZIP file
On the Tools menu, click Options.
Click the Advanced tab.
Click the Create button.
This causes the opening of a folder containing the debug log as a ZIP file.
The debug log indicates the position at which the issue occurred. Besides, it contains information about which kind of issue is involved and whether software or hardware is responsible for it.
Procedure in the case of image processing errors
In the case of image processing errors (for example: barcodes cannot be recognised, zonal OCR and regular expression do not work, low quality of the output file etc.), attach the zipped debug log as well as the following files to the support ticket:
- Backup file of the scanned document (TIF file)
- Used scan profile (XML file)
1. Start the Drivve | Image configuration tool.
2. On the Tools menu, click Options.
3. Click the Advanced tab.
4. Enable the function Create backup of every scanned document.
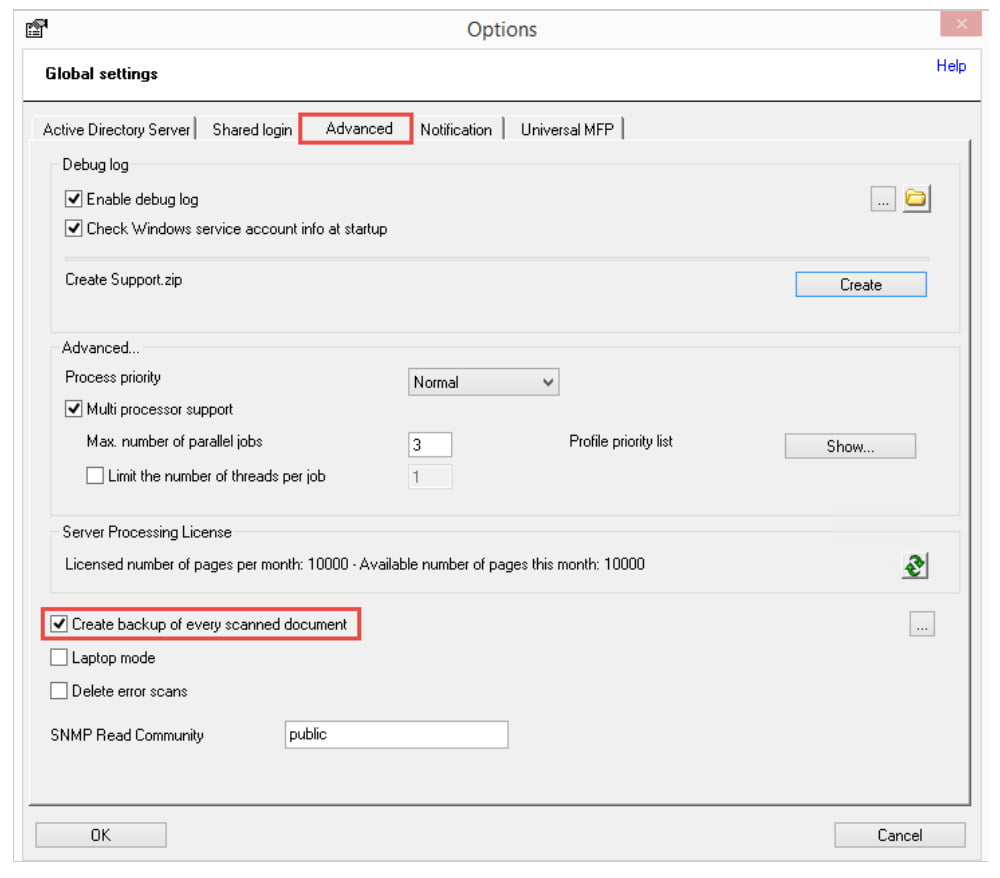
5. Click OK.
6. Click the Save button.
7. Scan the document which caused the error (or a similar document). Use the same scan profile.
8. Go to the following directory <install path>\Drivve\Drivve Image\work\backup
9. Upload the TIF file of the scanned document to the provided upload link.
Now, you have to export the scan profile you used in order to add it to our helpdesk ticket.
Caution: Disable the function Create backup of every scanned document after you have scanned the document.
10. In the profiles overview, select the scan profile.
11. On the Edit menu, click Export scan profile.
12. Click the Save button.
The scan profile is exported as XML file.
13. Go to the following directory <install path>\Drivve\Drivve Image\Templates\Profiles and upload the exported scan profile to the helpdesk ticket.