Troubleshoot PaperCut Print Analysis issues

If you’ve been having PaperCut Print Analysis issues, either you or the customer noticed that PaperCut MF is getting confused as to what printed out by not detecting the print job correctly… and that isn’t good.
Why do I have PaperCut Print Analysis issues?
While it is correct the vasty majority of the time, it can be tricky sometimes for PaperCut MF to detect what it needs know about the job to get the analysis correct if the driver is not playing ball.
Common issues include:
- Colour pages detected as greyscale (or vice versa)
- Not applying duplex discount (detects pages as simplex)
- The page count is incorrect
- Leaflet or N-Up printing costings are incorrect
Hopefully, these issues are detected during install testing and fixed before the customer is let loose on the system.
However, if analysis issues are left undetected they can have a serious impact on reports; and that could lead to some awkward conversations when it comes to billing.
(NB – don’t use a print monitoring solution for billing end customers, use a dedicated meter billing system like KPAX) there are all sorts of reasons the count could be wrong regardless of PaperCut detecting the jobs correctly.
How to tackle your PaperCut Print Analysis issues
What do the Selectec support team do when they get questions like this? Good question! Well, other than fighting over who gets the ticket, we grab a grenade energy drink and go through a few steps (as below). You can save time and follow the process, and if in the end you still need us, you will know what to send us. What can go wrong?
Step 1
Have a read of this previous guide we made – Windows & PaperCut best practises (part 1).
Pay close attention to the advanced printing features and bidirectional support options. Once they are off, try to print again.
Step 2
Check that you got the colour detection method correct. PaperCut has three options, and the most popular is page-level detection – but if the device (and or queue) is set to grayscale, then use the first option. Make sure this is set correctly or you will run into trouble! In most instances, page-level is perfect, and when installing a queue PaperCut does its best to select the best mode.

Tried those and still broken, what next?
Head on over to two of our favourite pages on the internet:
1. Check out the PaperCut MF release notes – have a search (ctrl+f in Chrome) for your printer make and see if a fix has been listed in a recent update. If it is… update!
2. Visit the PaperCut known issues page. Is your issue listed? If so, does it include a time frame or fix (if yes, YAY!) and either ask for the hotfix or update? If it is not a known issue then we have some work to do, so grab a coffee.
[well]
Side note – Picture This!
Do you have a document that is being detected as colour yet it all looks B&W to you? Does it have an image (perhaps in the letterhead)?
Colour is a tricky thing – a solid test is to ignore that image for now and create a two-page Microsoft Word document with one word on each page, the text on page one should be in the default blank font colour, and then the text on page two should be changed to be a colour (go for red).
Now… print it. Did PaperCut detect the job correctly? If it did, that means the image you were using is causing the issue. You can go further to test this by grabbing a sample greyscale Tiff file from here.
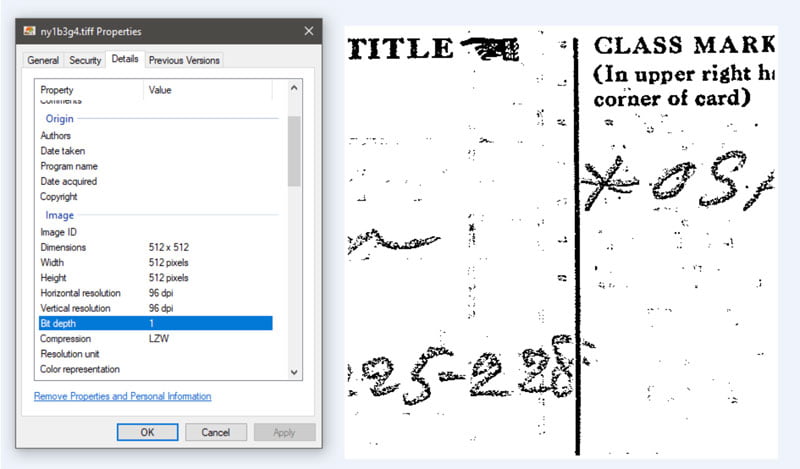
…add that to a new Word document and print it, we bet that it’s detected as greyscale. If you check the properties, you will see the low bit depth.

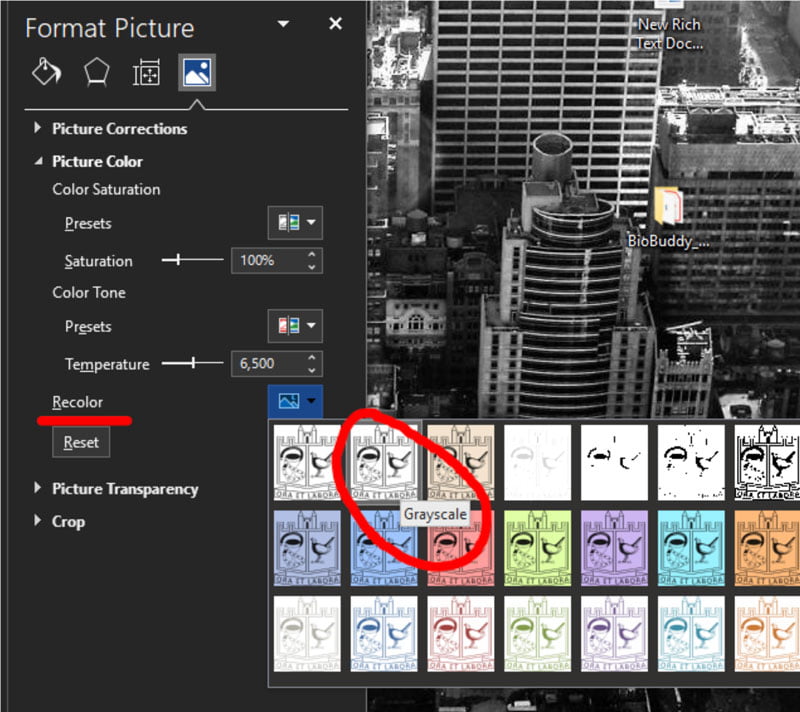
Now, you could “re-colour” your proper image in Word and set it to grayscale – that may help.

We mention this because a B&W document detected as being in colour comes up a lot, and it’s because the image contains some form of colour and is not actually greyscale. [/well]
The real fun starts here.
After you’ve done all the basics then really we need to make sure that you are on the latest version of MF. I know, I know, you already checked the release notes without any joy, but it is always wise to troubleshoot off the latest code and who knows, it may just fix it.
Now, if updating the customer’s install is going to cause trouble (perhaps they have a lengthy change request process, or they ran out of M&S) then grab the same driver and test it on your installation of PaperCut. Did it work? If so you know it is fixed! If not – we move onto the next part of the process.
Is the driver causing your PaperCut Print Analysis issue?
If possible, try a different driver. Life is short, maybe an older/newer/universal driver will work, and we can all move on. However, if the existing driver has specific functionality that the other drives are missing (we know you like your finishing options), then consider installing 2-3 test queues with different drivers. This way, you can see if one of the new options prints as expected and PaperCut detects everything correctly.
In fact, try a completely different driver – you don’t need to waste paper, get it held by PaperCut using a Nul port and see if PaperCut detects everything correctly once printed to the Nul port.
Using a driver like the PaperCut PS driver, is also another good idea, does that work? If so, you know it should work (if it works on one driver, why not your one?).
In all honesty, if you can recreate the issue on your setup using the latest code, then send us the driver download link, and we will do the rest.
No luck or not wanting to try a different driver?
Man, you are in for a treat! We need some logs and some data (or just data – depends on how you say it!). We need you to enable debugging in two places and perform some testing that highlights the issue.
The two places to enable debug are the PaperCut Application Server and PaperCut Print Provider.
How to enable debug in the print provider
Enable those options and send some print jobs that will have the issue.
Both sets of logs will provide useful information for us to troubleshoot any odd or intermittent issues. Get them switched on and wait for the problem to manifest itself again.
On top of that, if we can get the following bits together, we can likely provide a result promptly as opposed to having to go back-and-forth.
We’ll need to know, if not already known:
- PaperCut version (e.g. 19.2.3)
- Operating System on the server (e.g. Windows 2012):
- Operating System on the client (e.g. Windows 10):
- Brand and model of the printer (e.g. HP LaserJet 2300):
- Driver name (e.g. HP Universal Driver):
- Link to download the driver: www.hp.com/downloads/2300.exe
As drivers are often regional, we ask for the download link. If we download the driver, it may be different from the one you are using and as a result, we might not be able to get the same results.
[well] TL DR; update PaperCut – if that doesn’t help change the driver if that fails to email us the problem driver and we’ll see what we can do. [/well]
Simple huh!
Hopefully, the issue was resolved without the need for logs; it is rare a print analysis issue can’t be recreated by simply using the same driver on another install.
And that… is that! If you were reading this and had a problem, then we hope our methodology helped you work through the issue, and it adds context to why we sometimes ask for certain information.


