Here on our support desk, we get a lot of Linux traffic and we wanted to show you that setting up Mobility print on Linux is not so scary. We originally set this demo up on Ubuntu 16.04 (other distros are available) but decided to write up a guide for Ubuntu 18.04 as it is more recent and it should hopefully minimise confusion.
Warning – As this is for Ubuntu you may find some differences if you use a different distro.
So to print via Linux to Mobility Print we are going to use IPPS, see, that does not sound so bad, you are probably already using it to print from your Mac.
Go into Settings>Devices>Printers and select Additional Printer Settings in the right-hand pane.
In the Printers window select Add...
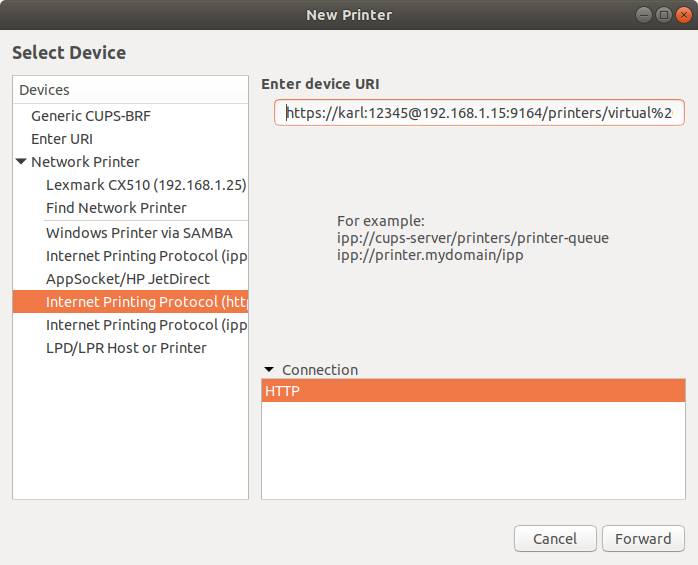
Choose Network Printer and Internet Printing Protocol (https).
At this point, you need to enter the queue name along with the login details in the following format
https://username:password@[FQDN_or_IP]:9164/printers/queuename
In the above example, our user is Karl and his password leaves much to be desired.
Driver selection time. The system shows Searching for Driver and then displays a selection window. You need to pick the driver and as PaperCut doesn’t have a global driver for Linux the best bet is to use the generic postscript driver from open printing instead of a device-specific driver.
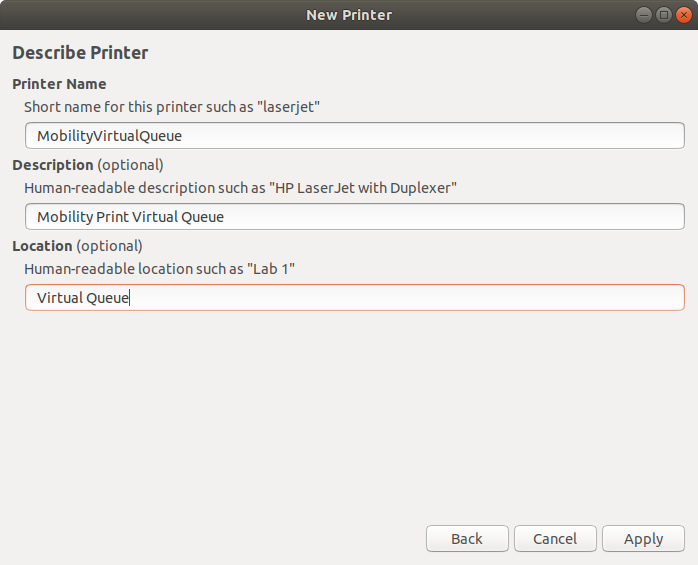
The next window allows you to give the printer a friendly (or aggressive) name, this is much the same as adding a printer via Windows.
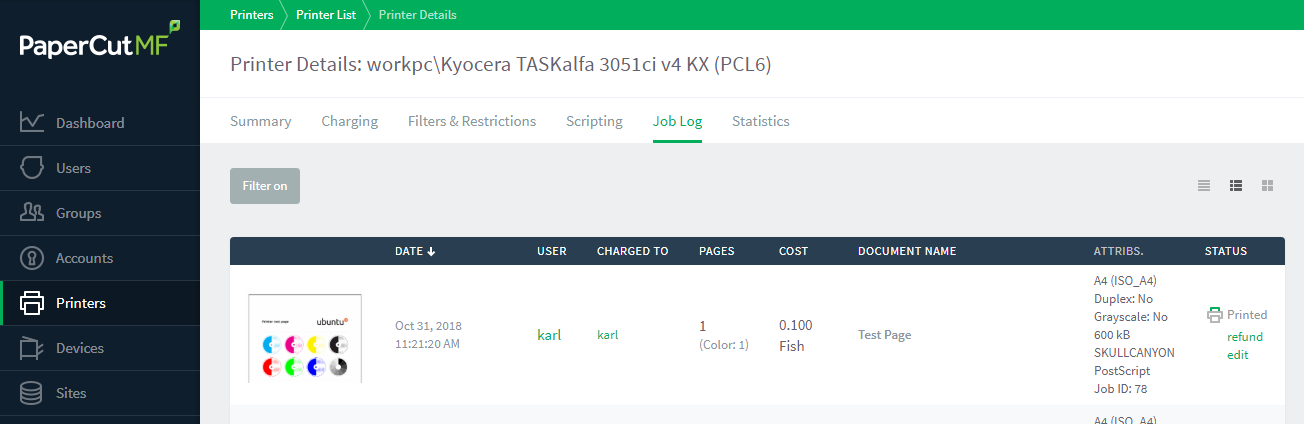
After you have added the location and description details you will be asked if you wish to print a test page, do it. Once done, log into the PaperCut Admin UI, select printers and then Jobs Pending Release. All being well your test job should be waiting for you paused in the queue. If you are happy then release the job and hop on over to the printers Job Log screen to confirm all is well. Fingers crossed!
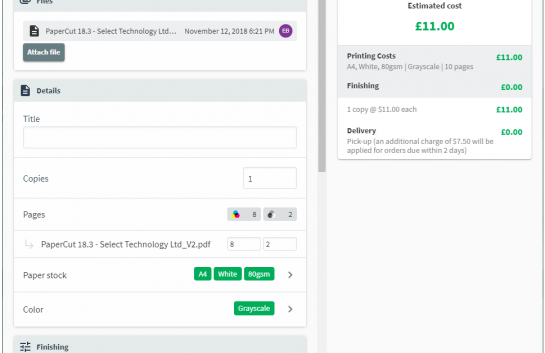
Job done, successfully printed and tracked.
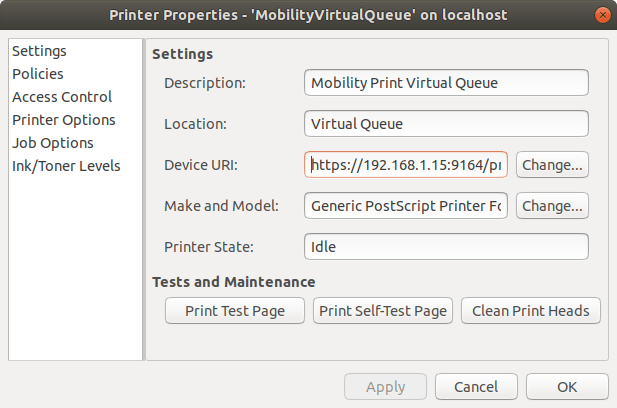
As a side note, the system only shows the username and password while you are setting it up if you return to the printer properties settings afterwards the URL does not show the sensitive information (nice huh).
We hope you find this useful, it’s something that crops up enough now that we can just happily point people at this blog post and be confident they will be able to succeed!

Movie buff, electric car enthusiast and a bigger pizza fan than your average hero in a half-shell, Matt is part of our caring pre-sales and professional services squad. When he is not thinking about his next deep pan, triple cheese, dough based Italian meal he can be found onsite or in front of a reseller delivering a first class install or training experience.
 info@selectec.com